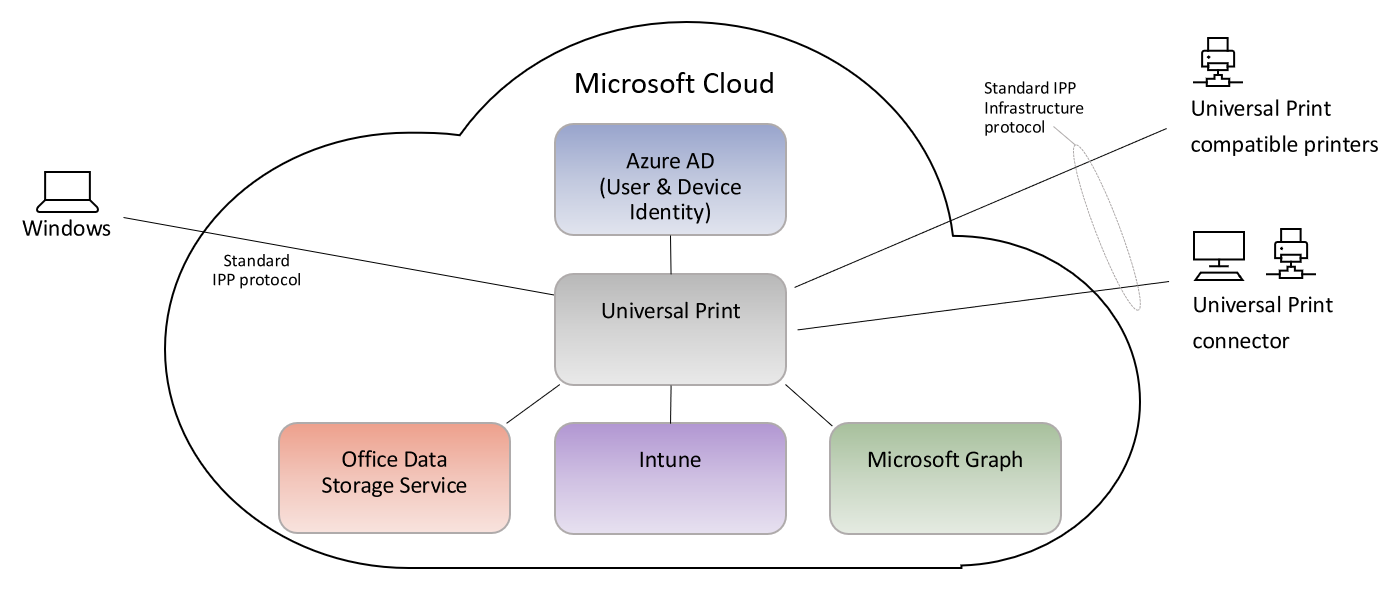
Universal Print is a new cloud-based printing solution from Microsoft that enables easy printing from Azure AD joined devices without the need of a print server. In the end (it’s definitely not ready) all Windows Server print management functionality will be moved to the cloud for easy, secure and modern management.
Universal Print is currently in private preview. It’s possible to sign-up for this preview to try the feature yourself!
What do I need?
There are a couple of prerequisites before you can start printing your documents.
- A Universal Print License should be assigned to every user that’s going to use the service and to all admins that will manage it.
- Only clients on Windows 1903 and above are supported.
- An internet connection is required when printing.
- A central Windows 10 client or Windows Server 2016 that has line of sight to your printers.
Why do I still need a central client/server?
At the moment of writing no printers exist (or can be bought) that can communicate with Universal Print directly. The only way to connect these printers to the service is by using the Universal Print Connector. In the future, Universal Print support will be added directly into the printers making the connector unnecessary.
The universal print connector must be installed on a Windows client or server where all of your printers are installed.
Install the Universal Print Connector
Installing the connector is a very easy task.
- Download the universal print connector.
- Install the connector. Installation will take less than a minute.
- Launch the connector and login with your administrator that has the Printer Administrator or Global Administrator role. Be sure to have the Universal Print license applied to this user.
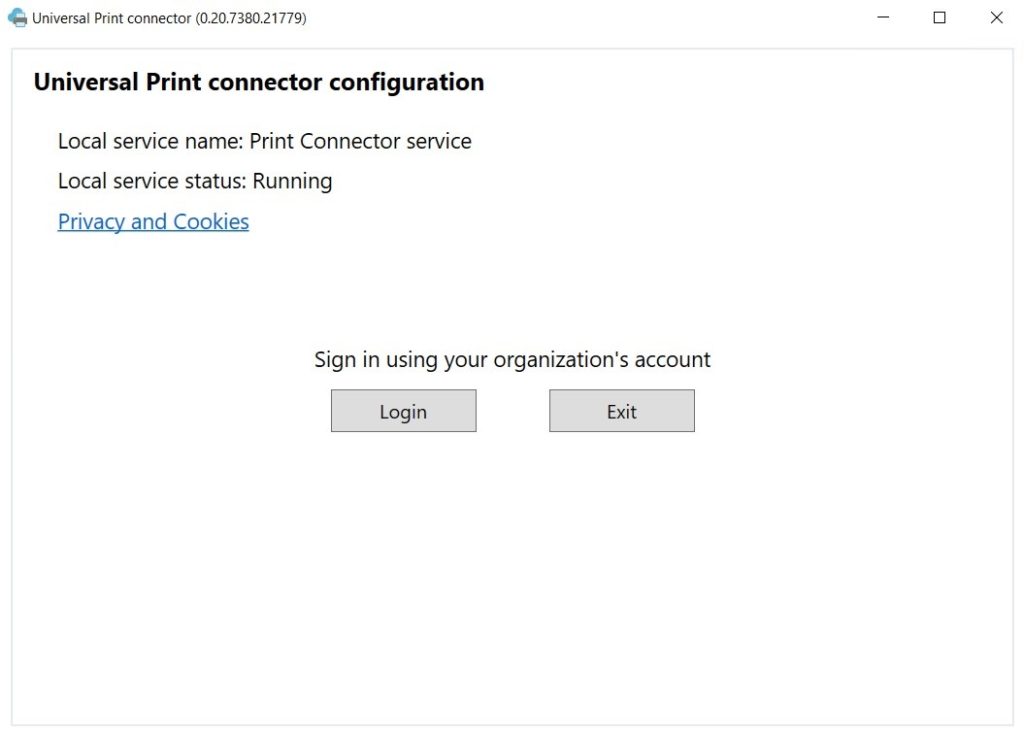
- Enter a name for your connector. This name will show up in your Azure Portal and cannot be changed.
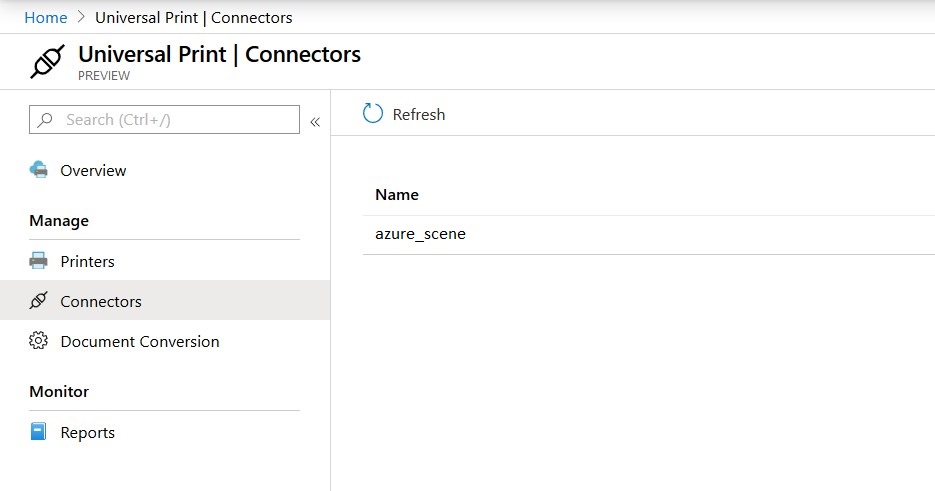
After the steps above your connector should be visible from Connectors in the universal print blade. Notice that this blade won’t show up in the search bar at the moment.
Register your printer
Registering a printer can be easily done by selecting the available printers and click Register. Printer registration is far from perfect at the moment. For example, registering the same printer with different settings won’t work.
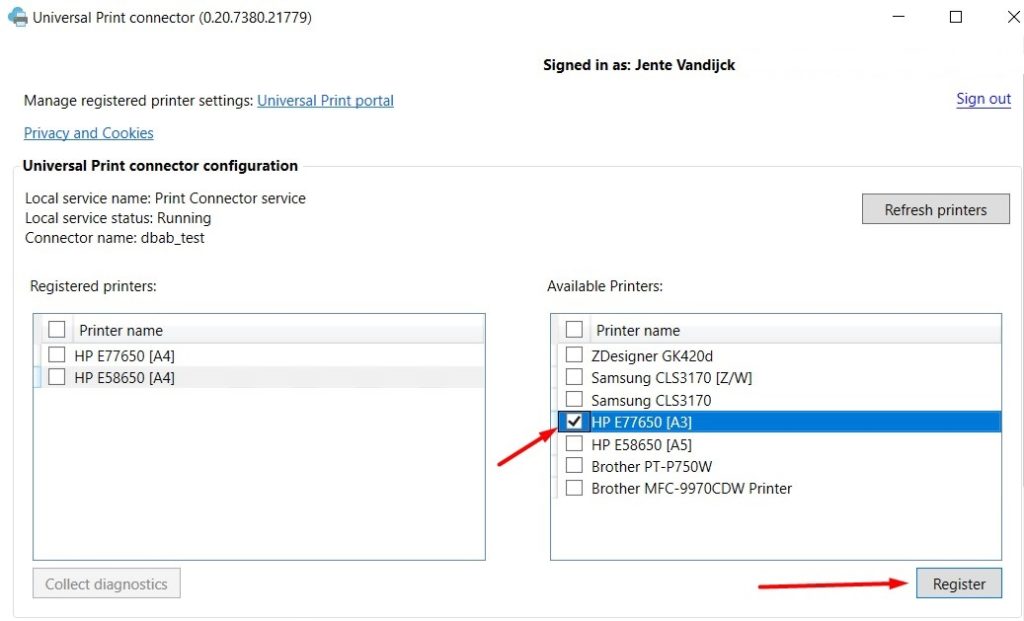
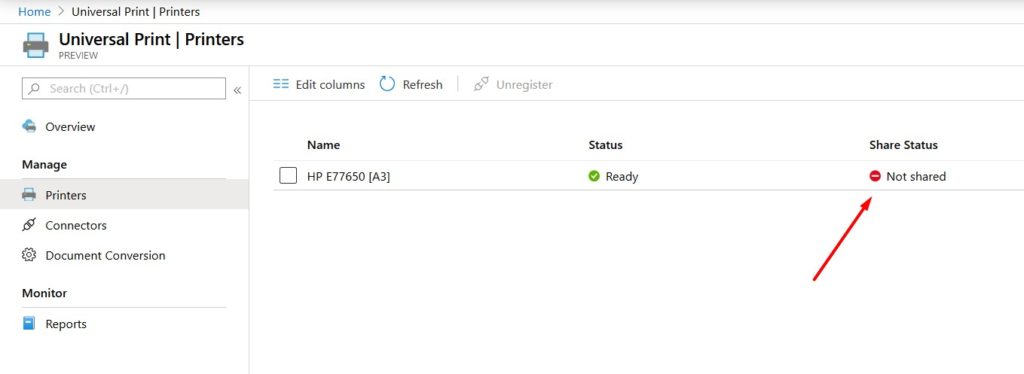
Registered printers will show up in your portal. Notice they are Not shared by default. Printers are not discoverable if they are not shared.
Share your printer
A printer needs to be shared before it’s visible to all (selected) users.
- Select your printer and clickk Share Printer.
- Enter a friendly name (will be visible to the end user) and click Share Printer again.
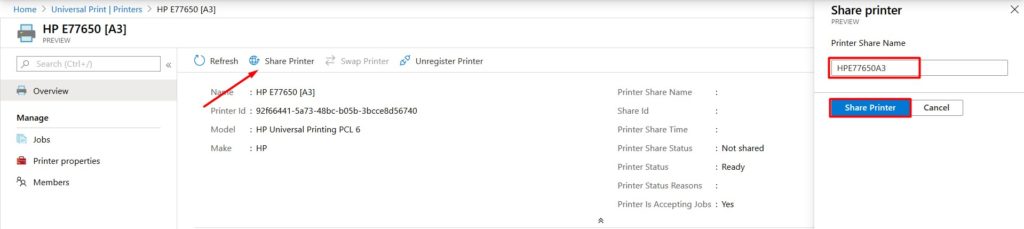
- Click members and add users or groups that should be able to use the printer. Before sharing the printer the add button will be greyed out.

Start printing!
After adding a user to a printer it can take upto 30 minutes before the printer can be added on their device. Only Windows 10 1903 and above is supported, the device should be Azure AD Joined and the user needs a Universal Print license.
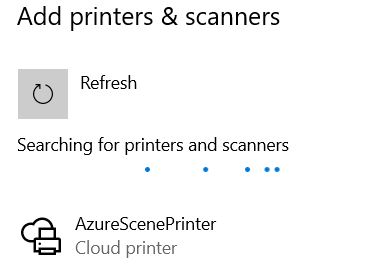
- Click Settings > Devices > Printers & scanners.
- Click Add a printer or scanner.
- Select your printer and click Add device!
- Start printing.
Need help, not seeing any of the shared printer I have in Universal Print
Is your Windows 10 client running on 1903 or above?
On-Prem/VM where we intend to install printer & Connector needs to be domain joined?
No, this is not required!
Is there way to autodeploy cloudprinters to users? I tried https://www.microsoft.com/en-us/download/details.aspx?id=101453(preview) but yet didn’t get it to work.
Hi Timo!
The provisioning tool should do the job. What exactely isn’t working for you?
Thank you!
We have print connect working. However, we now have a Canon printer with the latest firmware installed and are having trouble getting the printer registered to our Azure printer group. What URLs should we use for the Azure AD authentication URL and the Registration URL?
Hi, Microsoft Claim this solution eliminates the need for any on premise infrastructure, however surely there needs to be a machine for the connector?
Am i missing something?
Hi There,
It’s working fine.
How to setup default setting ?
I want to setup the print secure when the user print, he has to enter secure code on the Xerox printer